How to Configure Cloudflare in WordPress with W3 Total Cache
Best W3 Total Cache Settings With Cloudflare 3x WordPress Speed Hosting Crown
CloudFlare is excited to announce that the WordPress performance plugin W3 Total Cache (W3TC) now fully integrates CloudFlare's performance and security. CloudFlare and W3TC's missions are aligned: making sites perform as fast as possible. If you're a WordPress user, W3TC runs on your server and helps optimize your database and content.

W3 total Cache e Cloudflare wordpress veloce!
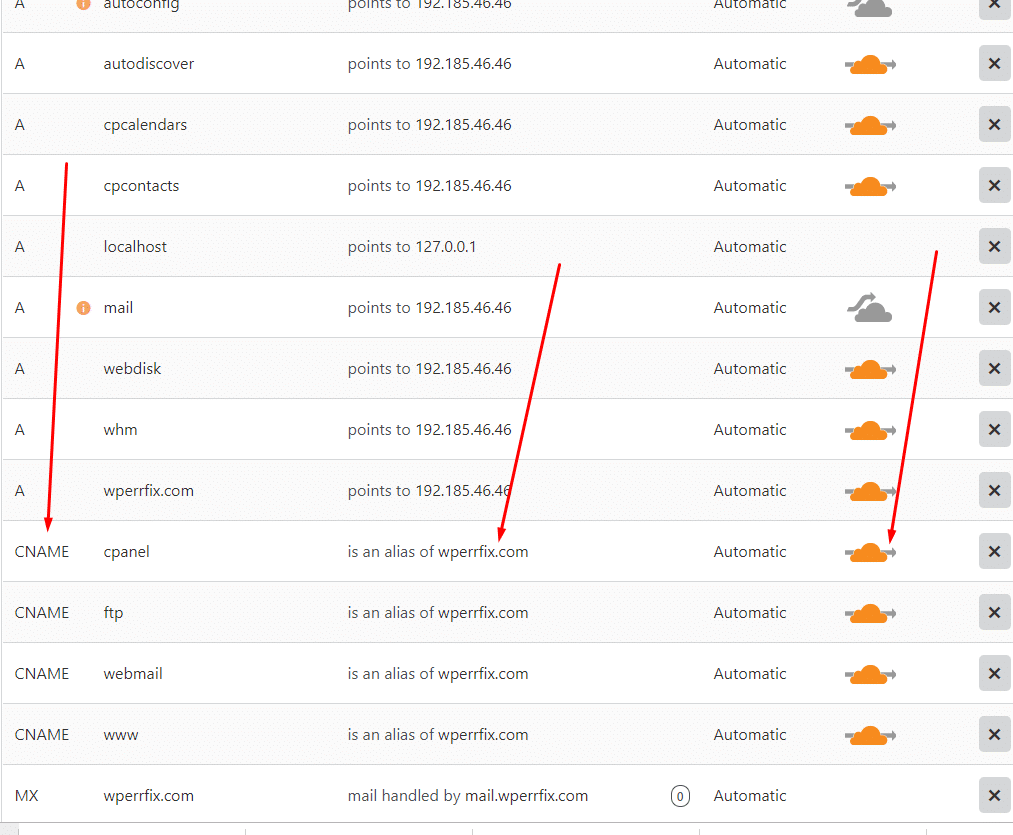
Step 3: Proxy traffic through Cloudflare in the DNS settings to use their CDN. Step 4: Activate the Cloudflare Extension in W3 Total Cache and click the settings. Step 5: Enter your Cloudflare email, API key, and zone. Step 6: Configure the W3 Total Cache Cloudflare settings (tips below).

W3 total Cache e Cloudflare wordpress veloce!
As you know that W3 Total Cache is an amazing plugin with many features and advanced minifying settings. If you integrate it with the CloudFlare then it would be great for your website's page loading time. Setup Website On CloudFlare With W3 Total cache. The question arises "how to setup CloudFlare with W3 Total cache?". Well, there are a.
How to Configure W3 Total Cache Cloudflare Settings For Best Result Website
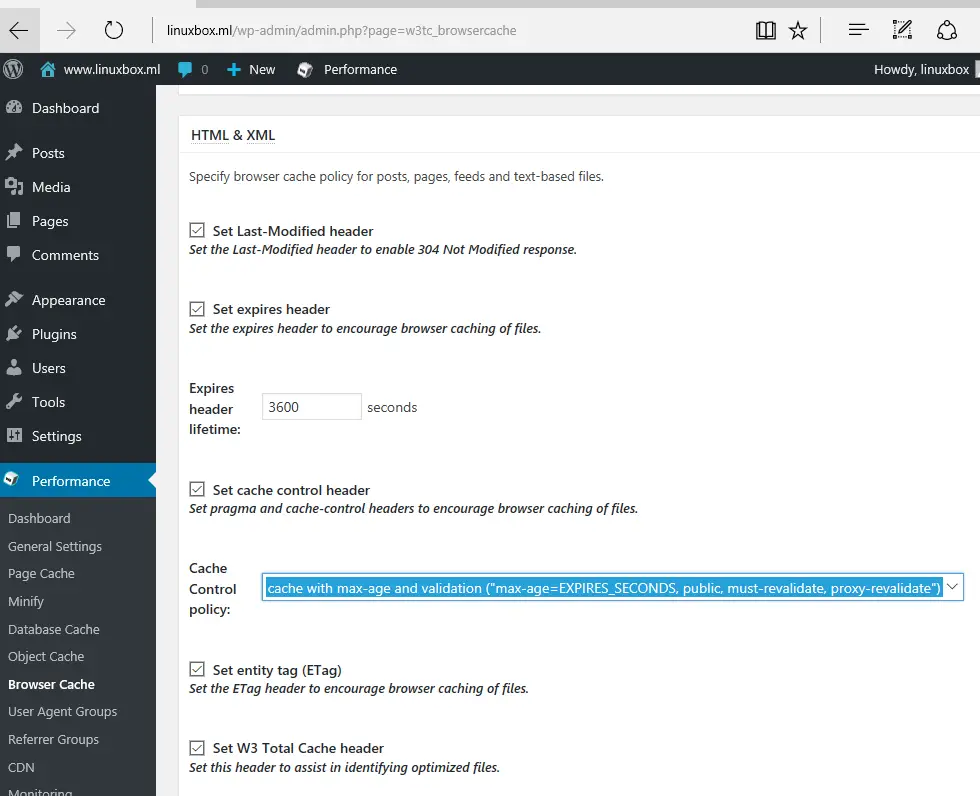
Click "Save all settings" button. 5、Cloudflare CDN Settings. Click the 'Speed' section, click the Optimization tab, turn Auto Minify on, toggle the Brotli switch to On. Click the 'Caching' section, click the Configuration tab. Under Browser Cache TTL section, set the option to Respect Existing Headers.
Configure WordPress with W3 Total Cache and CloudFlare CDN in LAMP
Step 4: Connect W3 Total Cache extension to Cloudflare. Once you've configured your site to use Cloudflare, you can go back to your WordPress dashboard and configure the W3 Total Cache Cloudflare extension. In WordPress, go to Performance → Extensions and click Settings under the Cloudflare extension. In the extension's settings, click.

Cloudflare W3 Total Cache YouTube
w3 total cache Cloudflare settings for your WordPress site. Most of the settings in the W3 total cache are preconfigured, but still, there is some space that you should have to go through and configure according to your need. And of course, these configurations will impact the final result. Here I will go through the most important Performance.
How to Configure W3 Total Cache Cloudflare Settings For Best Result Website
W3 Total Cache Configuration of Cloudflare. If you intend to use Cloudflare CDN using W3 Total Cache plugin then head over to the Extensions tab and assuming that you already have set up Cloudflare for WordPress, simply activate the Cloudflare plugin → go to the plugin's settings, and provide your email and API key for authorization.
Acelera tu blog con W3 Total Cache y Cloudflare Cómo Hacer Una Página
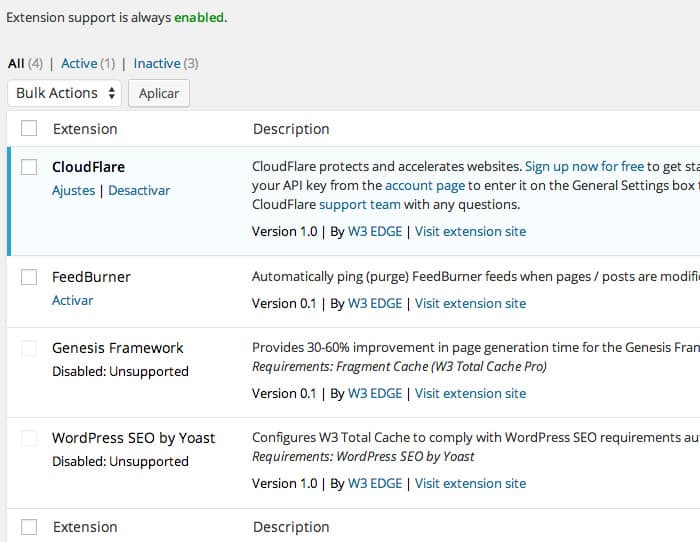
W3 Total Cache extensions: W3 Total cache plugin now comes with extensions in order to improve upon the existing functionality. Those people using the WordPress SEO by Yoast plugin can enable the Yoast SEO extension. Those people looking to implement Cloudflare on their sites need to install the Cloudflare extension for communication between.
How to Configure W3 Total Cache with Cloudflare Settings For Best Result WordPress Support
If you Put W3 Total Cache and Cloudflare together it will be a super duo blast for your website's speed. How to configure W3 Total Cache. I think you already know how to install a plugin in WordPress and activate that. The reason I am avoiding the installation section because W3 Total Cache has around 13 different options.

How to Properly Setup W3 Total Cache and CloudFlare
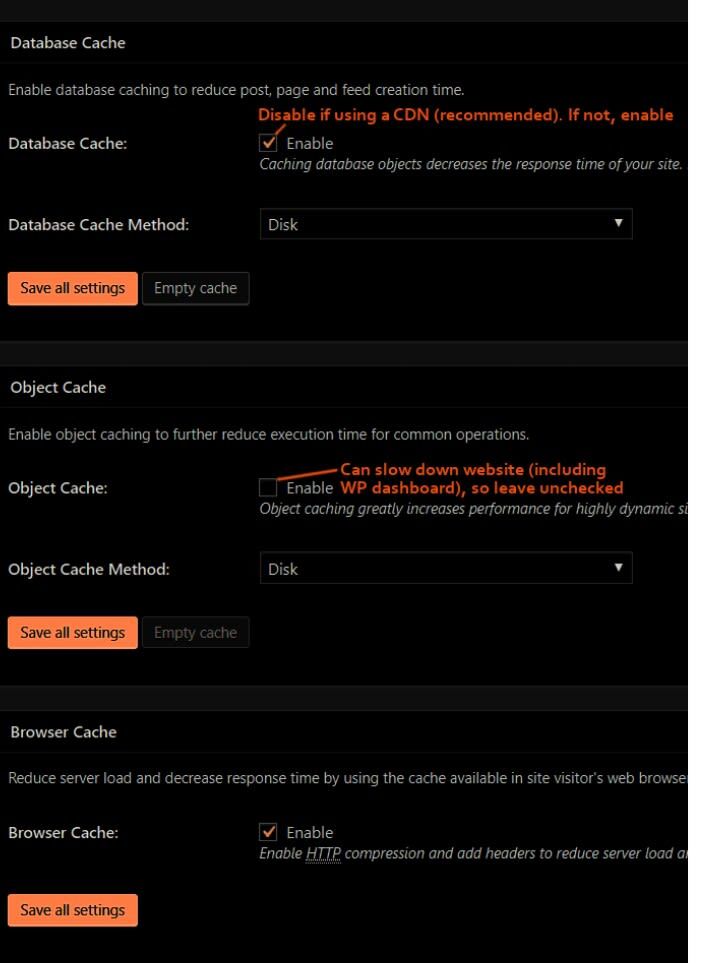
Part 2 - Setup W3 Total Cache Plugin. 1. To configure W3 Total Cache plugin, navigate to Wordpress dashboard and go to Plugins -> Installed Plugins from left menu and hit on Settings link from W3 Total Cache in order to start the configuration process. 2. Then, move to General Settings and enable Page Cache option.
W3 Total Cache + Cloudflare CDN = Faster, More Secure WordPress Site
Navigate back to the W3 Total Cache plugin in your WordPress dashboard. Navigate to Performance>Extensions, then activate Cloudflare and click on Settings. Enter the email address you used to setup your Cloudflare account and your domain name. The final thing you'll need to enter on this screen is your API key.

W3 total Cache e Cloudflare wordpress veloce!
View your Cloudflare Global API Key. Next, activate the Cloudflare extension in W3 Total Cache's "Extensions" page and click "Settings". In the "Credentials" section, click on the Authorize button. Authorize Cloudflare in W3 Total Cache. In the subsequent popup, input your Cloudflare account email and API key.
How to Configure W3 Total Cache with Cloudflare Settings For Best Result WordPress Support
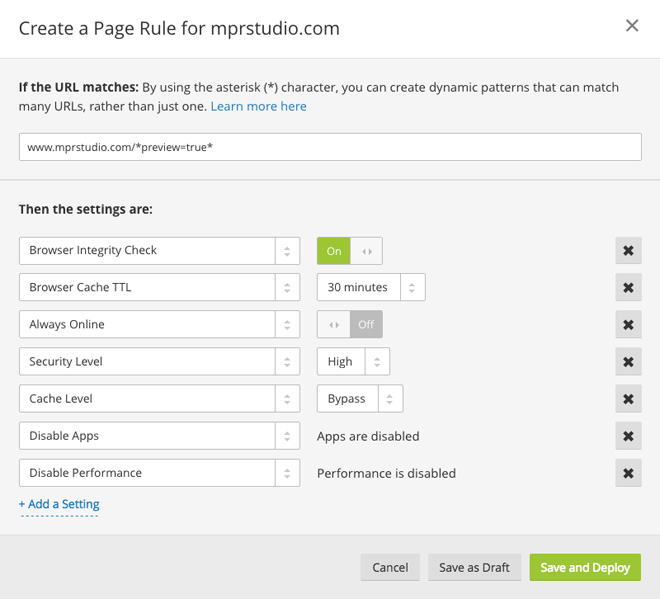
It is possible to cache the HTML of a WordPress site at Cloudflare's Edge using a feature known as "Bypass Cache on Cookie". This can dramatically improve the speed of your website and reduce server load; in cases where the HTML is cached, Cloudflare will not need to make a roundtrip to your web server.

How To Setup W3 Total Cache With MaxCDN (StackPath) + Cloudflare YouTube
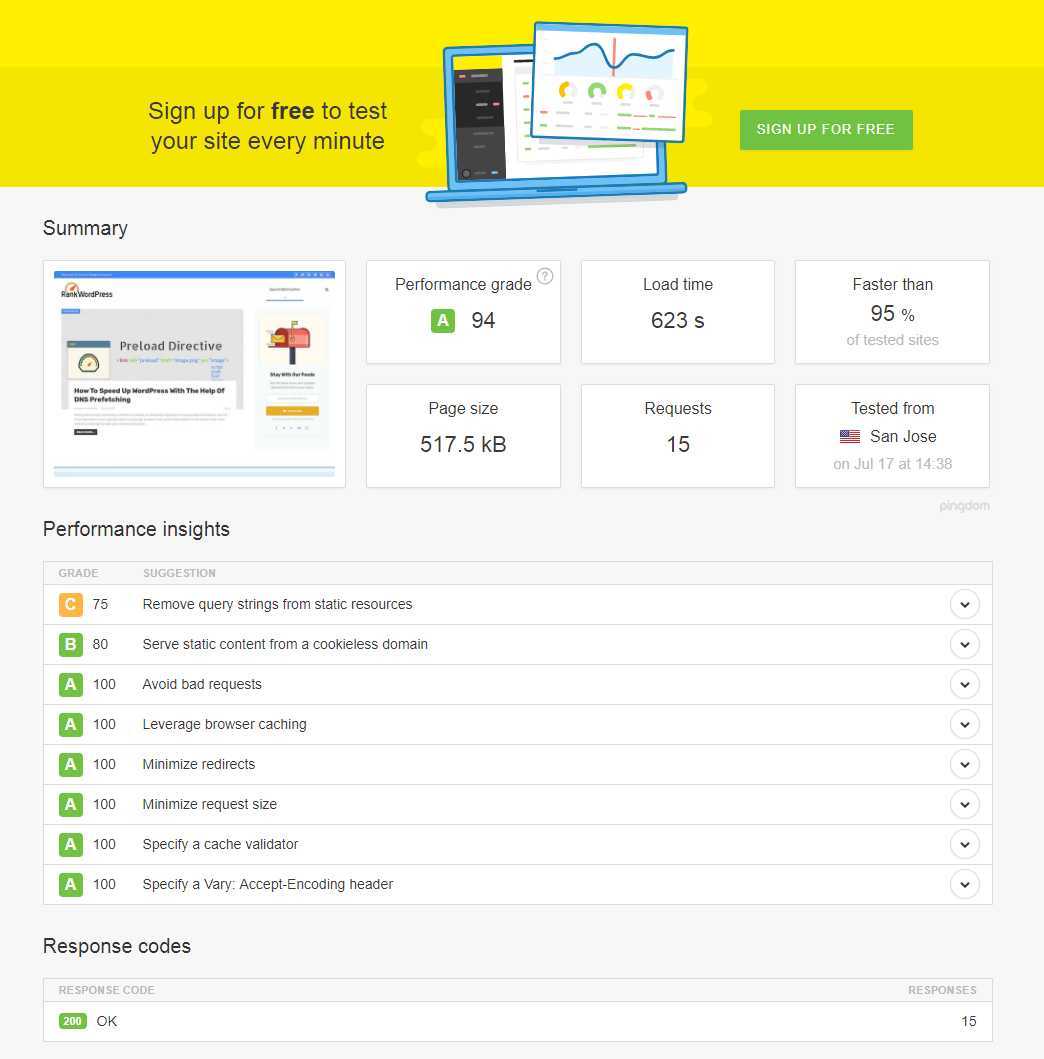
W3 Total Cache reduces website download times by creating static copies of your pages and posts, which makes them load more quickly. Take the performance of your site even further by using W3 Total Cache in conjunction with the free version of Cloudflare CDN. See all free and paid Cloudflare plans to make sure the free version will work with.

How to Setup W3 Total Cache with a CDN (CloudFlare and MaxCDN) Make A Website Hub
W3 total cache and cloudflare wordpress. I am just a little confused using these two things together. I am using W3 total cache on my blog alone with cloudflare. Now I know W3 total cache integrates cloudflare pretty well. I entered my API and stuff. But I noticed W3 total cache has a place for CDN credentials.
How to Configure Cloudflare in WordPress with W3 Total Cache
Activating Cloudflare in W3 Total Cache. Next, to ensure that WordPress is configured optimally for CloudFlare, you will need to activate the Cloudflare extension. In the WordPress Dashboard, Navigate to Performance → Extensions. Click on Activate under Cloudflare. After the extension is activated click on the Settings to authorize the.
